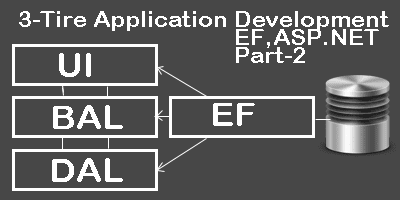
3-Tire Application Development Using Entity Framework,ASP.NET Part-2
Published on February 27, 2013
This is the continuous post of 3-Tire Application Development Using Entity Framework and ASP.NET in previous post I explained how to set up the project, How to add Entity models to Bloggy.Model Project.
In today’s post i will explain how to implement Data layer,Business layer and UI layer. So lets Start.

Implementing Data Access Layer(DAL) Let’s start with DAL. In general DAL contains SQL queries to do manipulations on Database. In this we will write application required methods for CURD operations. But since we are using Entity framework we will use LINQ Queries and EF methods For example Let’s say we want to retrieve all Posts form database. Bloggy.DL > Bloggy.cs
using System;
using System.Collections.Generic;
using System.Linq;
using System.Text;
using System.Threading.Tasks;
using System.Data.Entity;
using Bloggy.Model;

namespace Bloggy.DL
{
public class Bloggy
{
private BlogEntites _dB= new BlogEntites();

#region Posts
public List<Post> Post_getAll()
{
try
{
return _dB.Posts.ToList();
}
catch {
throw;
}
}
#endregion
}
}
**Impleamenting Business Logic Layer(BLL)**In general in BLL is used to implement business rules. But In this current example we don’t need any business rule to apply. We has to use DAL object inside the BLL to call appropriate DAL methods. Bloggy.BL > Bloggy.cs
using System;
using System.Collections.Generic;
using System.Linq;
using System.Text;
using System.Threading.Tasks;
using Bloggy.Model;
using Bloggy.DL;

namespace Bloggy.BL
{
public class Bloggy
{
private DL.Bloggy _dL=new DL.Bloggy();

#region Posts
public List<Post> Post_getAll()
{
try
{
return _dL.Post_getAll();
}
catch
{
throw;
}
}
#endregion
}
}
Implementing UI Layer UI layer could be anything which interacts with user. We can create different UI layer like Silver-light, Windows Forms, Web forms. For Current example we will use Web Forms as our UI Layer. Create a new aspx in Bloggy.UI layer and name it as Displayposts.aspx Displaypost.aspx
<%@ Page Title="" Language="C#"

MasterPageFile="~/Site.Master" AutoEventWireup="true"

CodeBehind="Displayposts.aspx.cs"

Inherits="Bloggy.UI.Displayposts" %>
<asp:Content ID="Content1" ContentPlaceHolderID="HeadContent"

runat="server">
</asp:Content>
<asp:Content ID="Content2"

ContentPlaceHolderID="FeaturedContent" runat="server">
</asp:Content>
<asp:Content ID="Content3" ContentPlaceHolderID="MainContent"

runat="server">
<asp:Button runat="server" Text="Dispaly Posts"

OnClick="DisplayPost_Click" />
<asp:GridView ID="postsresult" runat="server" >
</asp:GridView>
</asp:Content>
Its just a default aspx page. In this we add one Button control called “dipslayresult” and one grid control called resultposts. Implementing Code Behind for DisplayPosts.aspx Right click on Displayposts.aspx and select View Code form the menu. Change the code as below.
using System;
using System.Collections.Generic;
using System.Linq;
using System.Web;
using System.Web.UI;
using System.Web.UI.WebControls;
using Bloggy.BL;
namespace Bloggy.UI
{
public partial class Displayposts : System.Web.UI.Page
{
protected void Page_Load(object sender, EventArgs e)
{

}

protected void DisplayPost_Click(object sender, EventArgs e)
{
BL.Bloggy _bL= new BL.Bloggy();
postsresult.DataSource = _bL.Post_getAll();
postsresult.DataBind();

}
}
}
Here we have a method which will execute on Displaypost button click. Final Solution Configurations Finally we need to configure two files which are under Bloggy.UI Project. 1)Global.asax 2)Web.config First Open Your Global.asax file and change it as below.
using System;
using System.Collections.Generic;
using System.Linq;
using System.Web;
using System.Web.Optimization;
using System.Web.Routing;
using System.Web.Security;
using System.Data.Entity;
using Bloggy.Model;
using Bloggy.UI;

namespace Bloggy.UI
{
public class Global : HttpApplication
{
void Application_Start(object sender, EventArgs e)
{
// Code that runs on application startup
Database.SetInitializer(new BlogDbInitilizer());
BundleConfig.RegisterBundles(BundleTable.Bundles);
AuthConfig.RegisterOpenAuth();
}

void Application_End(object sender, EventArgs e)
{
// Code that runs on application shutdown

}

void Application_Error(object sender, EventArgs e)
{
// Code that runs when an unhandled error occurs

}
}
}
Now, Open Web.config and change the default connection string as below.
<add
  name="BlogEntites"
  providerName="System.Data.SqlClient"
  connectionString="Data Source=(LocalDb)\v11.0;Initial Catalog=Bloggy;Integrated

Security=SSPI;AttachDBFilename=|DataDirectory|\Bloggy.mdf"
/>